
To create a VPN service based on a VPS server, you need the following software:
- VPS server. VPS Server for OpenVPN can be purchased here for only $3/month.
- SSH client PuTTY;
- FTP client;
- Client OpenVPN.
You also need the IP address, username and password that the hosting provider provided you after purchasing the VPS.
To create a VPN service based on a VPS, you need to perform the following steps:
Step 1. Connect to the VPS through an SSH client
Step 2. Install an OpenVPN server on the VPS
Step 3 Downloading the ovpn file with the key to the PC
Step 4. Creating a VPN connection
Step 5. Checking the VPN connection.
Step 1. Connecting to the VPS via an SSH client
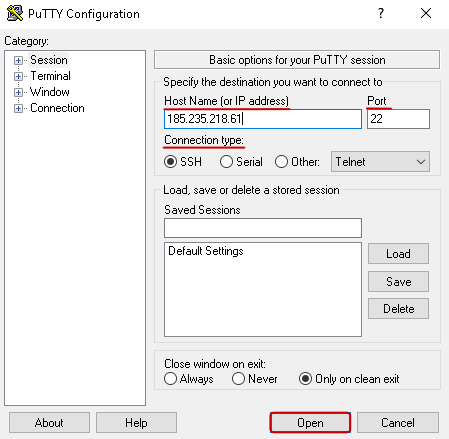
To connect to the VPS, open the PuTTY SSH client and fill in the fields:
- Host Name (or IP address) = IP address of the VPS server.
- Port = "22".
- Connection type = "SSH".
To connect, click on the Open button.
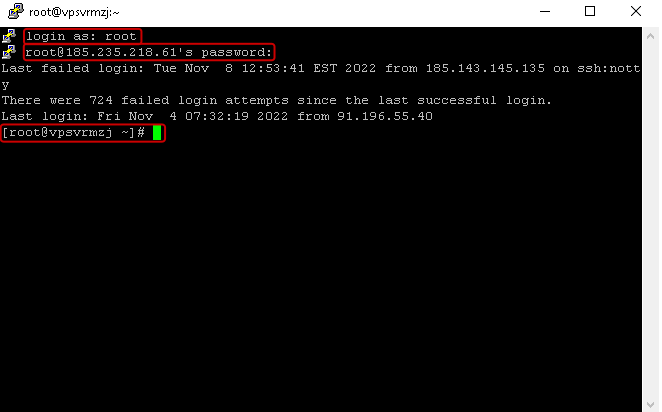
As a result, the ssh client will display a field for entering commands login as:, in which you need to enter your login and press the Enter button on keyboard.
Next, a field of the form login@IP address password: will appear in the ssh client, in it you need to enter the password and press the Enter button on the keyboard.
Note: when entering a password, characters are not displayed on the command line. The password is entered correctly if the ssh client displays a string like "[login@VPS server name]".
Step 2: Install OpenVPN Server on VPS
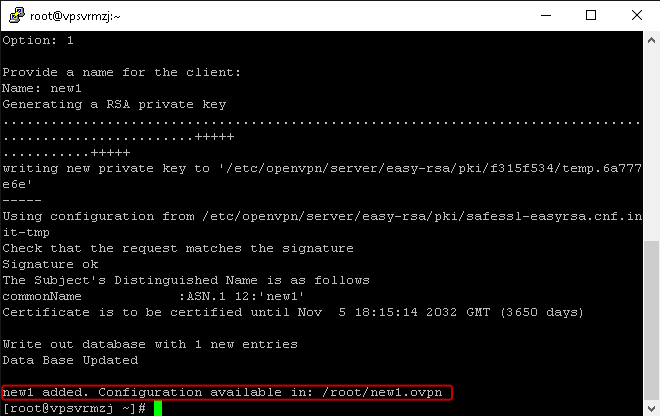
To install an OpenVPN server on a VPS, type wget https://git.io/vpn -O openvpn-install.sh && bash openvpn-install.sh and press the Enter button on your keyboard. Next, the command line will display a message about the successful installation of OpenVPN on the VPS, and will also offer a choice of actions. You need to select 1). Add a new client.
To select a value, enter its number on the command line and press the Enter button on the keyboard. As a result, the line Name: will be displayed, in which you need to specify the name of the new client.

After the process of creating a new client is completed, the command input window will display information about where on the VPS server the ovpn file with the key needed to configure the VPN connection is located.
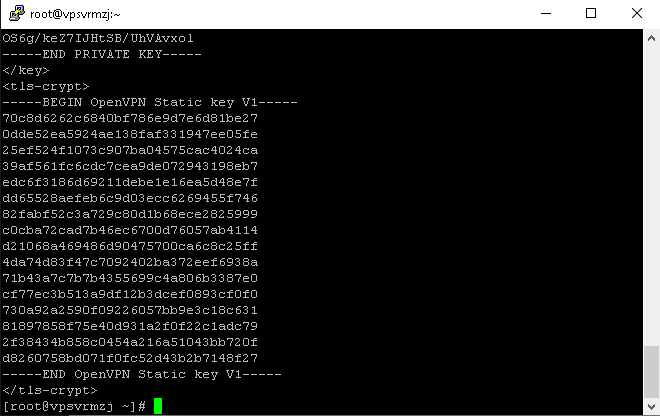
To open the contents of a file in an ssh client, run the command lsto open the folder containing the file, followed by the command cat filename to open the contents of the file. To confirm the input of commands, press the Enter button on the keyboard.
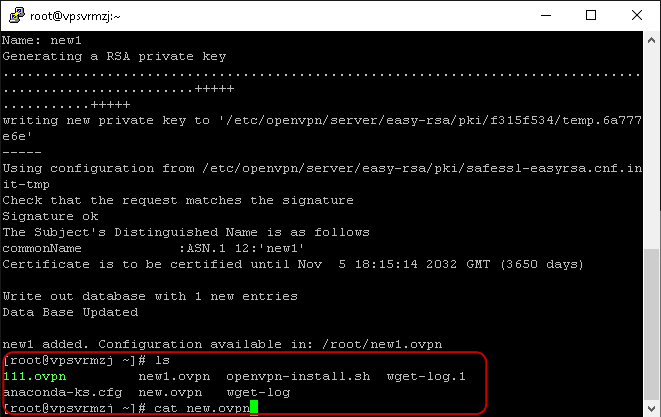
This will open the contents of the ovpn file, starting with the line clientand ending with </tls-crypt></ em>.
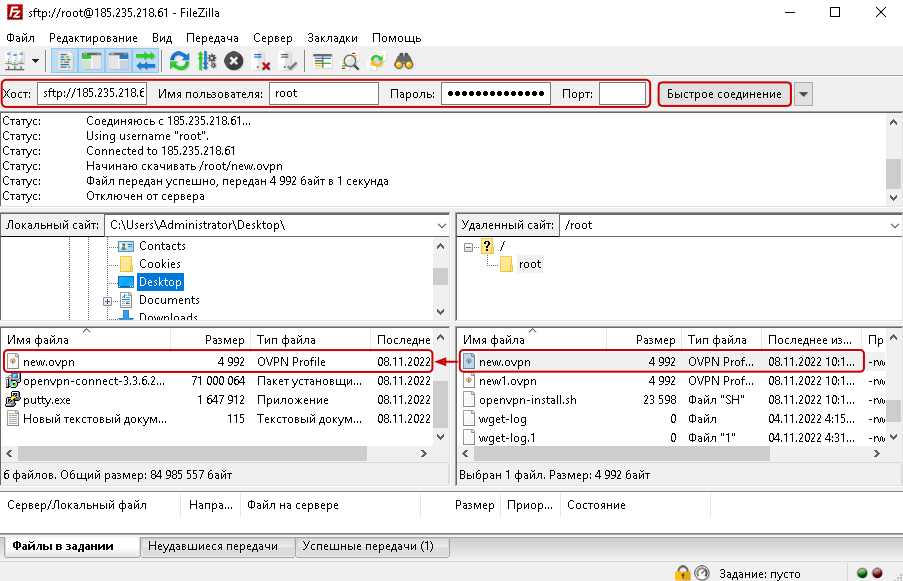
Step 3. Downloading the ovpn file with the key to the PC
To download an ovpn file from a VPS server via an FTP client, go to the FTP client and enter the following authorization data:
- Host = VPS server IP address.
- Name = login (username).
- Password = password. Click on the connection button.
The field of successful authorization in the FTP client window will display folders and files on the PC on the left, rights - folders and files on the VPS server. Drag the ovpn file from the right side of the window to the left.
Note that on a Linux PC, the ovpn file looks like a normal test file, but on a Windows PC it appears as an icon:
![]()
Step 4: Create a VPN connection
Creating a connection on a Windows PC and a Linux PC is slightly different. Both options are described below.
How to create a VPN connection on a Windows PC
Right-click on the ovpn file icon, and then select the context menu item Open with. Next, a window will open in which you need to select the OpenVPN Connect client and click the OK button.
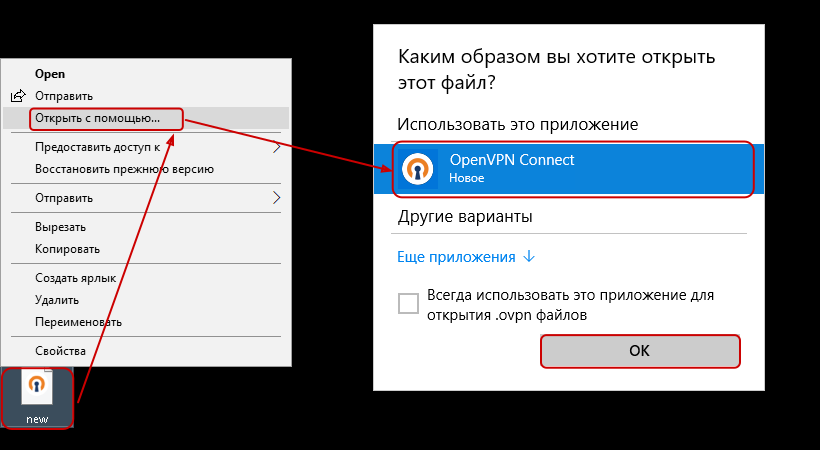
After selecting a program, the Import .ovpn profile? dialog will open. To confirm opening the ovpn file, click the OK button.
 <
<
Next, a window will open with the fields Profile Name and Server Hostname (locked). To confirm the connection, click the Connect button.
 <
<
The Profiles window displays connection details.

How to create VPN connections on a Linux PC
Click on the Internet connection icon in the lower right corner of the screen and select Network settings from the menu that opens.

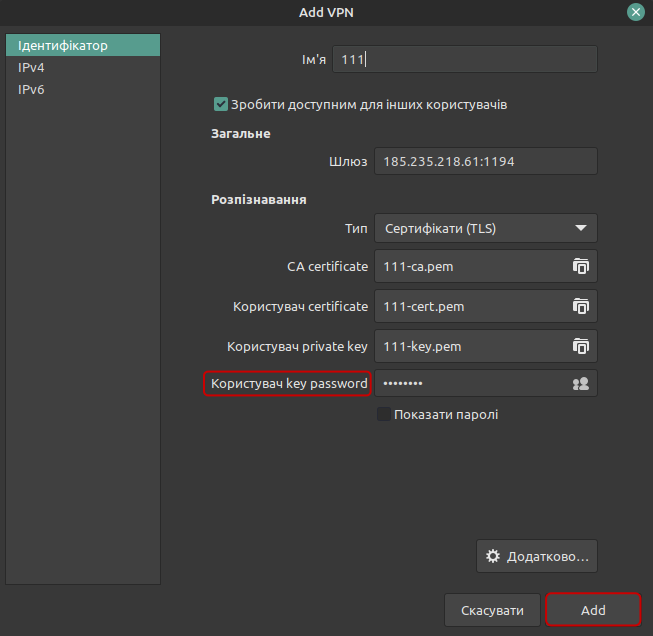
In the network settings window, click the + button, and in the Add VPN window that opens, select Import from file .
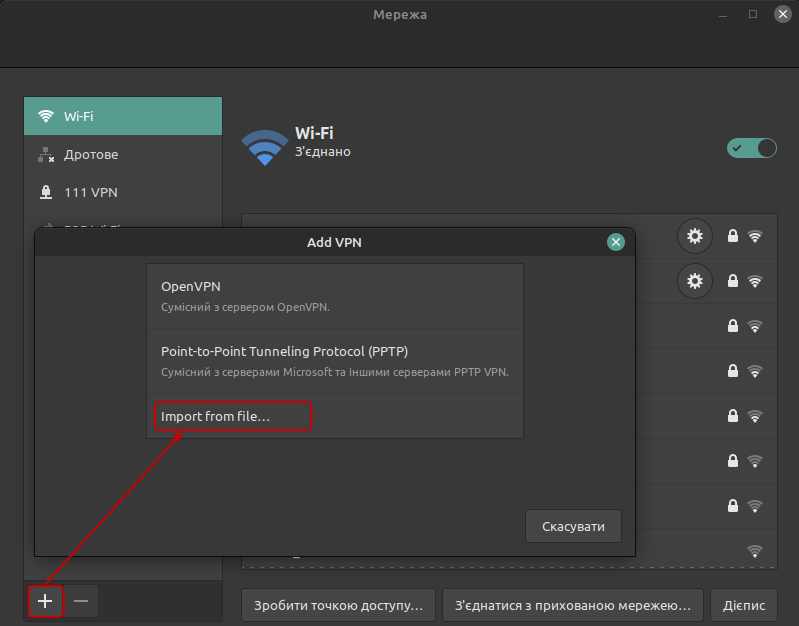
Next, a file import window will open, in which you need to select the ovpn file. As a result, a window will open with the name, gateway and other data about the VPN. In the key password field, enter the password and click the Add button.
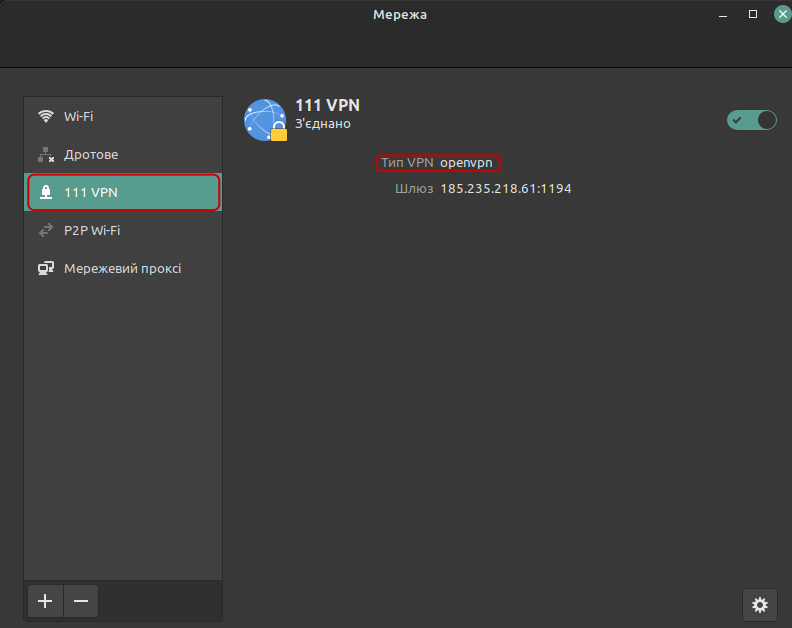
A VPN server with connection type openvpn is now displayed among the available connections.
Step 5: Check VPN connection
After connecting the VPN, go to https://whoer.net. If done correctly, the My IP field will display the IP of your VPS server.
Recall that here VPS for OpenVPN is available for $3/month.</ p>
